- Published on
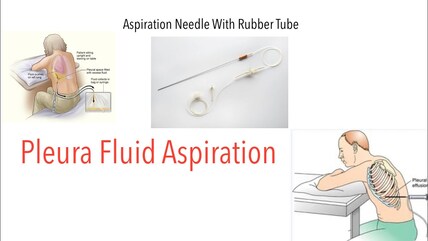
Clinical Procedures - Pleural Fluid Aspiration
Indications
• Diagnosis of cause of pleural effusion
• Relief of symptomatic pleural effusion.
Contraindications
• Recurrent effusion (chest drain, pleurodesis should be considered)
• Empyema (requires intercostal drain)
• Mesothelioma (tumour may spread down needle track)
• Bleeding diathesis.
Risks
• Pain
• Cough
• Failure to resolve
• Re-expansion pulmonary edema
• Pneumothorax.
Procedure Tips
• If unsuccessful, aspiration may be performed under ultrasound guidance:
discuss with your Radiology Department
• Passing a small fluid sample through a blood gas analyser may yield a rapid pH but should be avoided if the sample is purulent.
Alternative method
• An alternative method is to attach a fluid-giving set to one port of the
3-way tap and the 50mL syringe to the other. With this set up, you can aspirate 50mL into the syringe, turn the tap and empty it down the tubing into a container before turning the tap back to the syringe port.
The syringe, therefore, never needs to be disconnected and the risk of pneumothorax or other complication is reduced.
This describes the procedure for aspirating as much pleural fluid as possible. If only a small sample is required for diagnostic purposes, use a green needle and 20mL syringe and follow a similar method to that described under 'ascitic tap'.
Equipment
• Sterile pack
• Sterile gloves
• Cleaning solution (e.g. chlorhexidine)
• Large-bore (green) cannula
• 3-way tap
• 50mL syringe
• 5mL 1% lidocaine
• 23G (blue) needle
• 2 x 10mL syringe
• Dressing/ gauze
• Selection of sterile containers and blood culture bottles
• Heparinized (ABG) syringe.
Procedure
• Fluid should be aspirated from a position 1-2 intercostal spaces below the highest level at which dullness is percussed.
• Introduce yourself, confirm the patient's identity, explain the procedure, and obtain informed consent
• Position the patient leaning forward with arms rested on a table or over the back of a chair
• Percuss the effusion and choose a suitable spot for needle insertion
• Clean the area with chlorhexidine
• Using the blue needle and syringe, infiltrate local anaesthetic down to the pleura:
• © Insert needle just above a rib to avoid the neurovascular bundle
• Be sure to pull back on the syringe each time before injecting to ensure you are not in a blood vessel
• Once fluid is withdrawn, you have reached the pleura
Insert the cannula perpendicular to the chest wall, aspirating with another syringe as you advance until resistance reduces and pleural fluid is aspirated
• Remove the needle and attach the 3-way tap
• You may now aspirate fluid using the 50mL syringe. Once the syringe is full, close the tap, disconnect the syringe, and empty into a container. Re-attach the syringe, open the tap and repeat:
• The pleural space should never be in continuity with the environment or pneumothorax will occur
• Do not drain more than 2.5L at one time
• Remove the cannula and apply the dressing
• Send samples for:
• Microbiology: microscopy, culture, Auramine stain
TB culture
• Chemistry: protein, lactate dehydrogenase (LDH), pH, glucose, amylase
• Cytology
• Immunology: anti-nuclear antibody, rheumatoid factor, complement
• Take simultaneous venous blood for glucose, protein, LDH
• Request chest radiograph to confirm success and look for iatrogenic pneumothorax.
Documentation
• Date, time, indication, informed consent obtained
• Aseptic technique used?
• Local anaesthetic used
• Site needle inserted
• Colour, consistency, and volume of fluid aspirated
• Any immediate complications
• Investigations requested
• Signature, printed name, and contact details.

0 Comments
